Excited to Give ANGULAR
Another Shot? ( PART - I )


Angular is a free, open-source framework for frontend used
for making single-page web application which is based on typescript.
Getting started with an Angular application is quite easy and quick.
Step 1 : Install Angular CLI (command line interface) by simply
running in your terminal / power shell.
Step 2 : Create your Angular Project, as shown below.
Step 3 : To run and
develop your application locally run the following commands:
Angular Components
are the building blocks of an Angular
Application. While working on an Angular Application we build or
develop our app in bunch of components and attach them with parent
(app component) which is responsible for rendering angular application.
Each component consists of the following things:
1) Html file
2) Styling File
3) Typescript File
4) Spec File
Standalone Component
Released in Angular 14 and made stable in Angular 15, you can delete
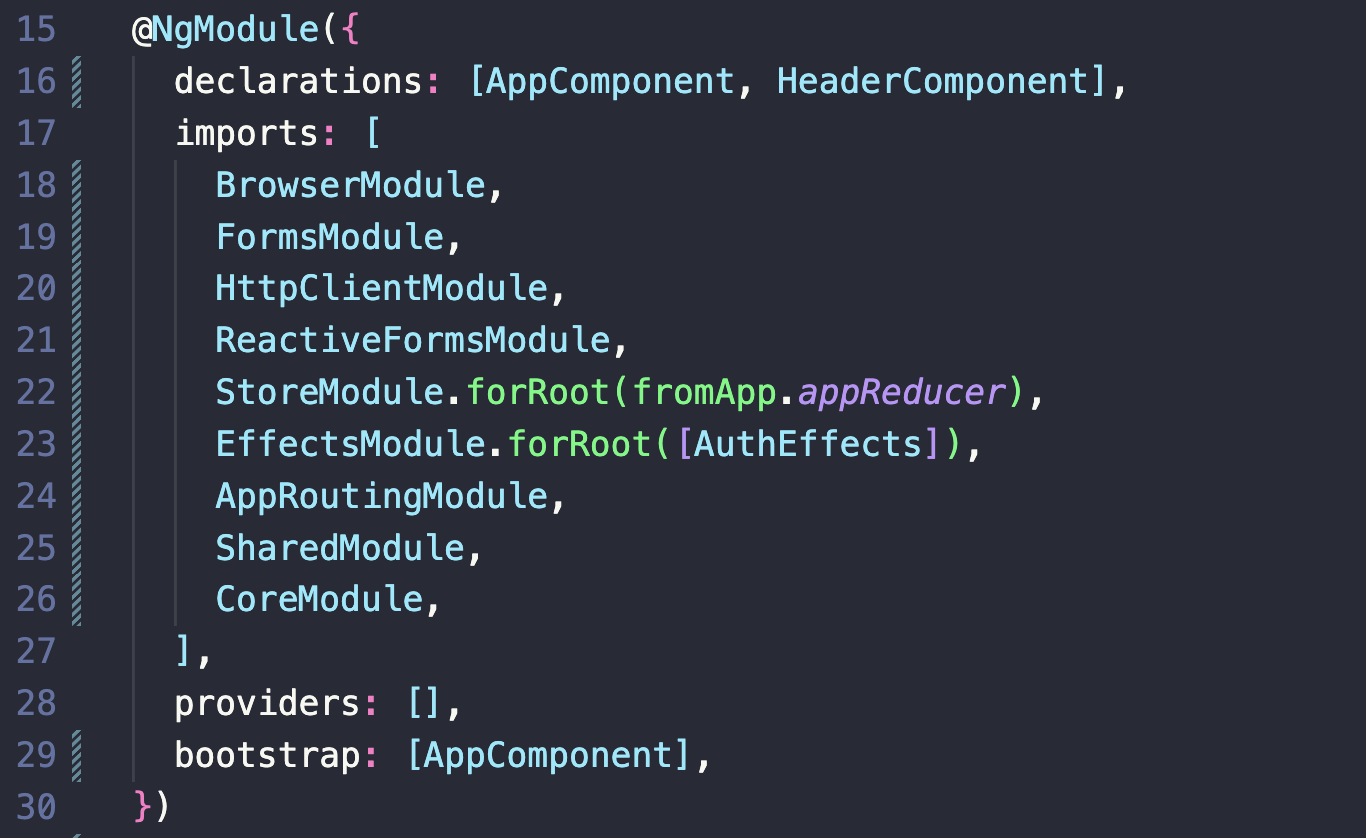
all your module. Modules in angular is a great concept (in theory) and it
helps angular a lot in reducing the bundle size as different parts of your
app get loaded. But overtime as your app grows you need to add more
modules and eventually if you want to add or remove dependencies it is
hard to tell which dependencies you put there to support which
components, making the module difficult to read, maintain leading a
mess.

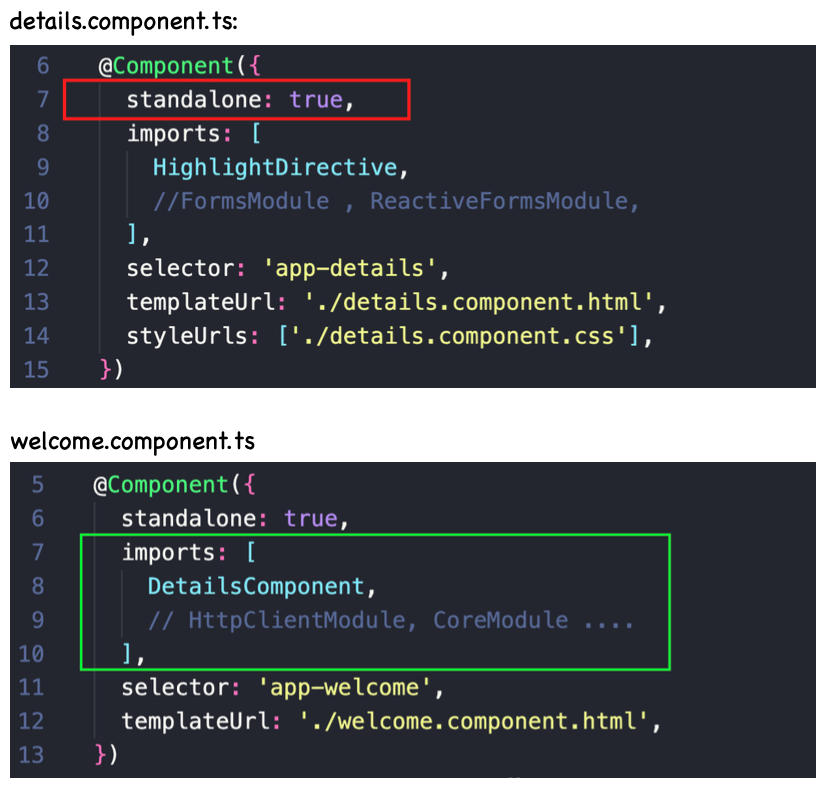
With standalone components you can define / add all your
dependencies right on your components itself, all you have to do is to
define { standalone: true } on your @Component( ) and let the magic
happen for you.

[ In case, if you already have an angular app no worries you can still
apply these changes and slowly remove these things from your
app.modules.ts until they are empty and deletable ] .
If ever got stuck in switching your angular app to standalone
component, this Angular doc is highly recommended [https://
angular.io/guide/standalone-components] for shifting to the latest
version of Angular.